Because a lot of people asked for it after the last few pages of Clockwork, I thought I’d throw together a quick cloud tutorial for you guys! The brushes are yuumei’s.
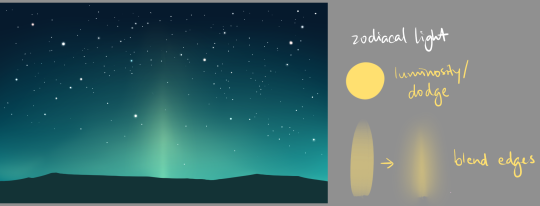
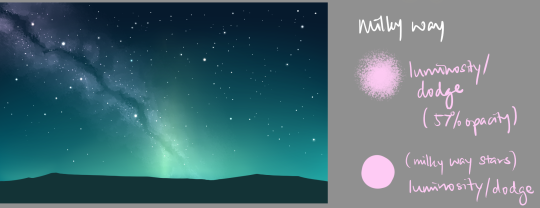
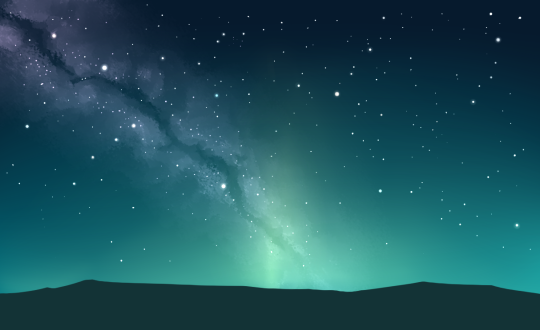
I got a request to do a tutorial on how to create galaxies! Well, here you go!! Painting galaxies is so much fun, and can be really calming. So have fun!!
If you have any questions or if I made a mistake, feel free to message me!
Do not remove caption
Here’s a very fun tutorial by @magiciansardonyx for you all today.
The quality is out of this world!
– @art-res / @astrikos
first i do text. if the line number is odd, make the middle line the longest. then, i use the marker pen. i do everything in gray because i can see it better against the white bg.
appropriately size your marker. dont make the top and bottom too cramped. i use my trackpad for this part because my hand is shaky so i dont trust using my pen and tablet ;; _ ;; go to the left (or right, i wont judge) and make one mark. i just left click on my trackpad.
this is the anchoring thing you were encountering! it’s not a random place on the canvas, it’s anchoring to the last mark you made. hold shift and drag it over to the opposite side, making sure that it’s straight. make the mark and you have a pill shaped bubble! i use transform and drag it around to make everything centered and even and nice.
i use the curve tool to make the tail. make it as thick or thin as you please.
then, go to layer property and press the black circle with the white circle around it for border. make the edge color black and then size the thickness of the edge however you like. i like my stuff pretty thin because the point of this all is to make a bubble that takes up less space in each panel.
lock the layer and turn it white (or whatever color you want) and that’s a bubble! it’s more steps than just using the bubble tool in CSP, but i like the results better. hope this helps!
Heya guys I’ve noticed the pumpkin bulba pattern going around and lots are asking how to make tiled images/patterns, so I just wanted to point out to a video tutorial I made if you’re looking to make tiled images yourself!
Also I have answered a grand total of maybe three notes for the past few months so I apologize if you sent something and I haven’t answered!